
Here is how to make a no-sew fabric star this holiday season with this easy-to-follow tutorial and all the helpful tricks!
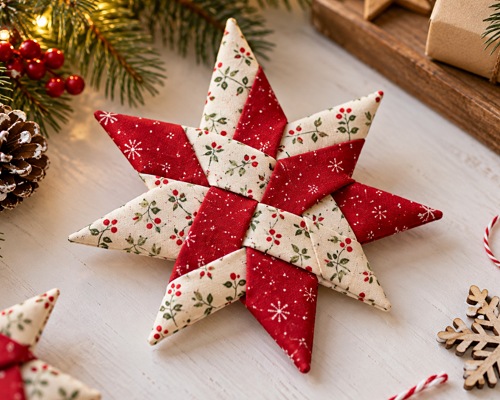
Four strips of fabric, a few clever folds, and suddenly you’ve got a star—with no sewing required! This little no-sew fabric star project is a fun way to use up leftover quilting cotton, especially those prints that are too pretty to toss but too small for a bigger project.
Essentials That You’ll Need
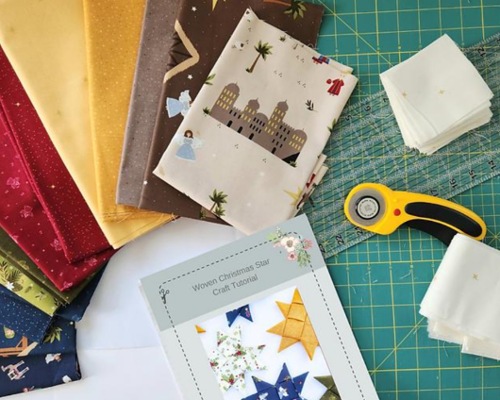
To make this no-sew fabric star, you’ll need four pieces of fabric, each cut to 4 inches by 14 inches. Use two low-volume prints, which are light, quiet prints, and two reds, so the colors alternate nicely once the star is assembled.
Then you need to keep an iron and ironing board handy, along with a ruler and scissors or a rotary cutter for cutting your strips.
A few extras are optional but useful. Fabric starch, like Mary Ellen’s Best Press, makes the fabric crisp and easy to fold. A stiletto tool and a pair of tweezers help with tucking in tight spots. And a little embroidery floss and some temporary fabric adhesive or glue basting come in handy if you want a hanging loop or a sturdier finish.
Start by choosing cotton fabrics that press well, then mix and match your colors to suit your decor.
No Sew Fabric Star in 6 Easy Steps
Follow these instructions to make your very own no-sew fabric star.
1. Choose and Prepare Your Fabric
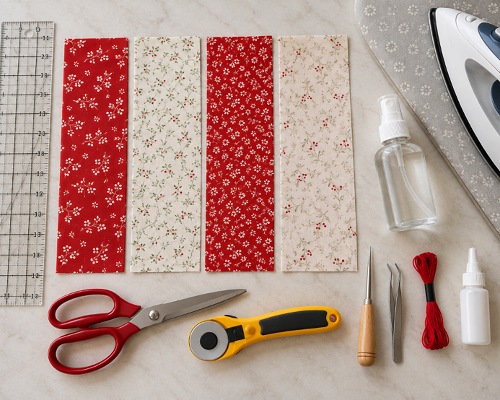
Pick your four pieces of fabric, two low-volume prints and two reds, and cut each one to 4 inches by 14 inches. Use a ruler to measure accurately, since the pieces need to be the same size to fit together later.
Pro Tip: Press each piece flat before you begin, so you’re working with smooth fabric, and your folds come out crisp.
2. Starch and Fold the Strips
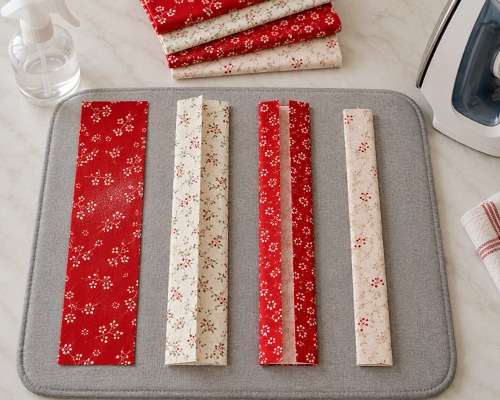
Spritz each strip with fabric starch, then iron it until it’s dry. This gives the fabric a crisp texture that makes folding much easier.
Next, fold each strip in half lengthwise, with the wrong sides together, and press to make a center crease. Fold the outer edges in toward that center crease, leaving a small gap between them, and press again. Finally, fold the whole strip in half along the original center crease, and press it firmly.
Quick Advice: Take your time with the pressing. Each fold needs to be sharp for the strips to fit together neatly in the next steps.
3. Shorten One End of Each Strip
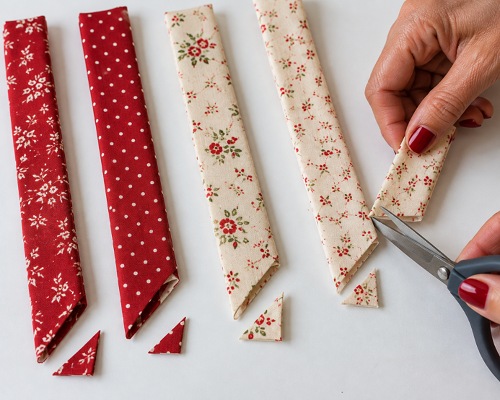
Trim one end of each folded strip slightly, leaving about an inch and a half of extra length on the other end. These longer tails are what you’ll fold into the star’s points later.
Quick Advice: If you want a neater finish, trim the extra fabric from the tails before you tuck them in. Less bulk makes the points much easier to shape.
4. Arrange and Interlock the Strips
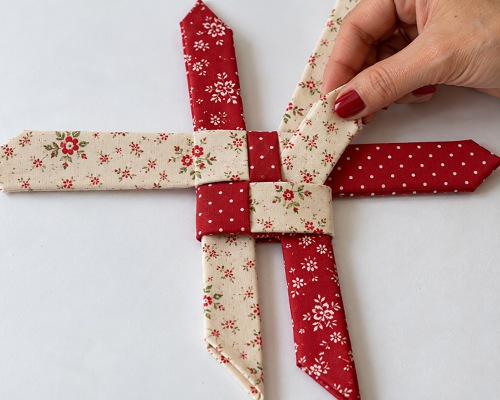
Lay out the four strips so the contrasting colors sit opposite each other. Turn each strip so its folded edge faces clockwise.
Now interlock them. Tuck the open edge of one strip into the folded edge of the next, working toward the center. Repeat this all the way around all four strips until they’re woven together into a flat base.
Note: Pay close attention to which way each folded edge is facing. This is the step that decides whether your strips lock together properly.
5. Form the Star Points
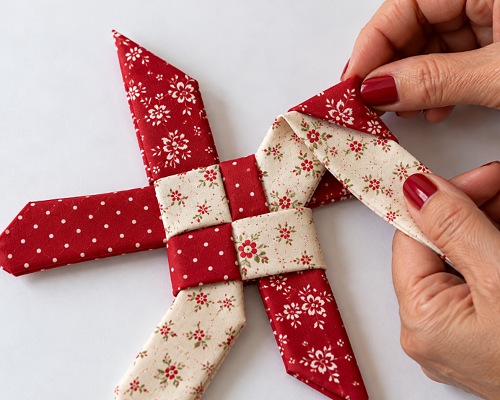
Flip your base over so the longer fabric tails are on top. Fold the top layer of fabric down over the shorter piece to begin forming a point.
Flip the whole piece over, and fold the fabric down toward the center to make the star tip. Fold the tip in half to the left, and tuck the remaining tail underneath to hold the point in place.
Repeat this for all four points, alternating the direction of your first fold, once away from you, then toward you, so the points form opposite each other, and the star keeps its shape.
Quick Advice: Tweezers or a stiletto tool make it easier to tuck in the last bit of fabric, especially on the smaller folds.
6. Add Optional Finishing Touches
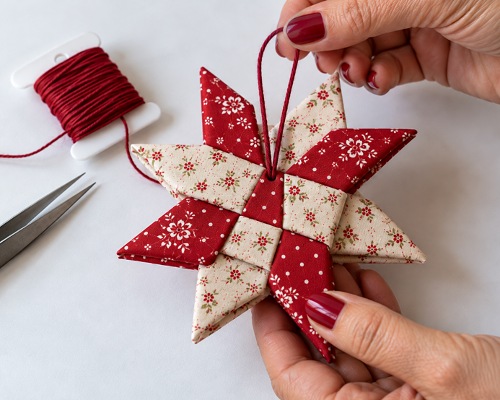
If you’d like to hang your star, thread a length of embroidery floss through the center and tie a knot to make a loop.
For extra durability, apply a little temporary fabric adhesive or glue basting to the folded edges where the points meet, then press the glued areas with an iron to set the adhesive. This helps your star hold its shape through display and storage.
Tips and Few Mistakes to Avoid
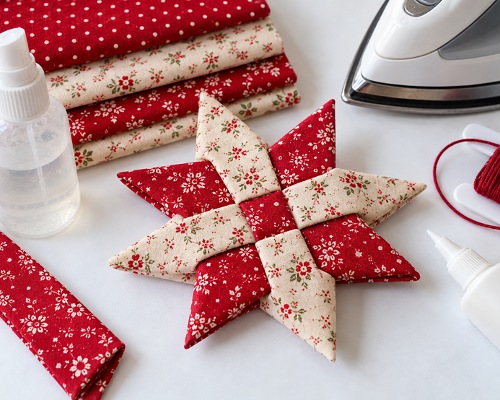
Starch your fabric before you fold it. It makes the fabric crisp and easier to handle, and it gives you cleaner lines, which matters a lot in a project made entirely of folds.
Press each fold firmly as you go. A soft or uneven crease makes it harder for the strips to interlock, and it shows in the finished points.
Keep a close eye on the orientation of your strips when you interlock them. If the folded edges aren’t all facing clockwise, the strips won’t lock together the way they should, so it’s worth checking before you tuck.
Practice the point folds on a spare strip if you can. The sequence of folds and tucks takes a little getting used to, and the second or third star always comes out neater than the first.
If you’re adding glue or adhesive, apply only a little. A small amount is enough to hold the folded edges in place, and too much can leave stiff spots.
These no-sew fabric stars are a fun, budget-friendly way to turn leftover fabric into something festive. Try different fabric prints and color combinations to make them your own, and enjoy making a holiday decoration you’ll look forward to bringing out year after year!