

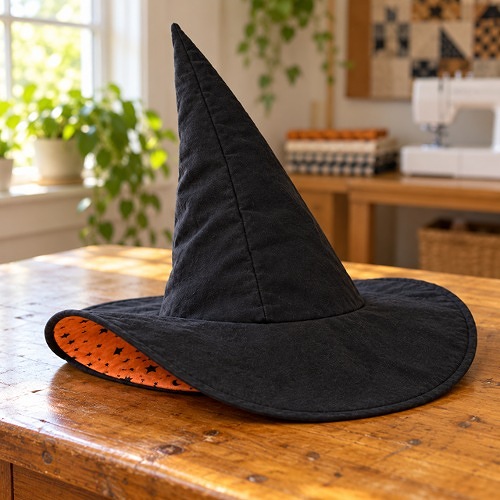
Learn how to sew a reversible witch hat with this easy DIY sewing tutorial if you’re looking to make something fun this Halloween!
Make your own DIY reversible witch hat with two contrasting fabrics and a wire-supported brim. It’s quick to sew and great for completing your Halloween costume. Read till the end to know more!
Materials Needed to Begin With
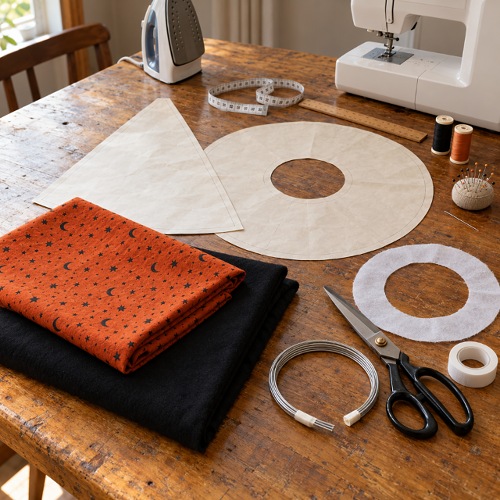
- Black flannel fabric
- Contrasting flannel fabric, such as checked flannel
- Paper for making the pattern
- Measuring tape or ruler
- Fabric scissors
- Sewing machine and matching thread
- Pins or sewing clips
- Fusible interfacing for extra brim stiffness
- Thick, flexible wire
- Tape to cover the wire ends
- Iron
- Hand-sewing needle for closing the opening
DIY Reversible Witch Hat Steps
Step 1: Create the Paper Patterns
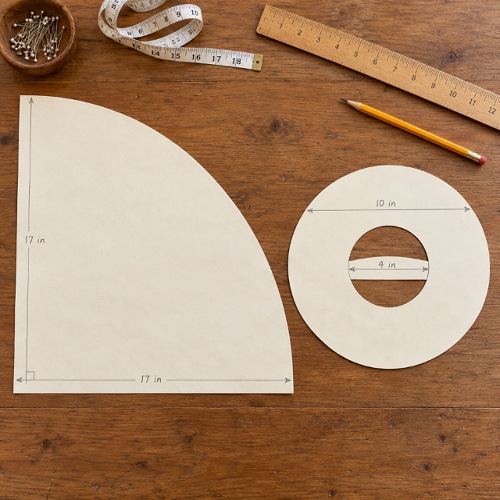
Start by preparing two paper templates: one for the pointed cone and another for the circular brim.
For the cone, draw a right angle with both straight edges measuring 17 inches. Measure 17 inches from the corner to mark the curved edge between the two straight sides. For the brim, draw a large circle measuring 10 inches in diameter. Draw a smaller circle measuring 4 inches in diameter inside it to create the brim opening.
Step 2: Cut the Fabric Pieces
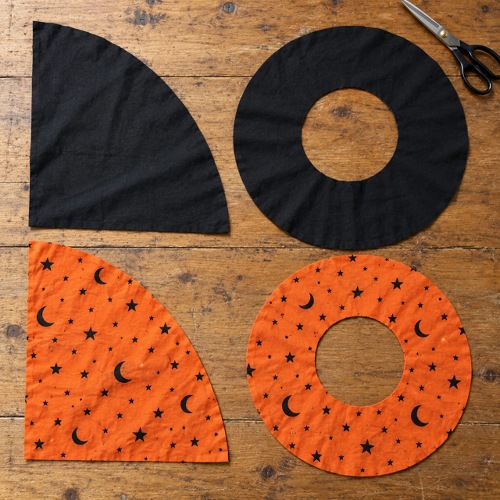
Using the paper templates, cut one cone and one brim from each fabric. Now you have four fabric pieces in total: two cone pieces and two brim pieces.
Note: For the brim to hold its shape better, apply fusible interfacing to the wrong side of the fabric that will form the stiffer side.
Step 3: Sew the Cone Pieces of DIY Reversible Witch Hat
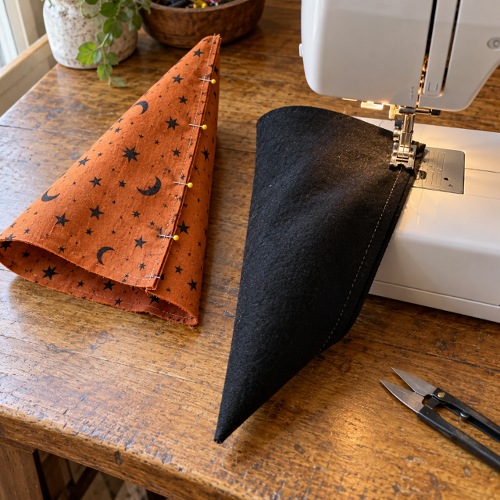
Now fold each cone piece in half with the wrong sides facing each other. Sew along the straight raw edges using a ½-inch seam allowance.
Pro Tip: Carefully trim the seam allowance near the tip without cutting through the stitches. This helps the cone turn out neatly and gives the hat a sharper point.
Step 4: Attach the Brims
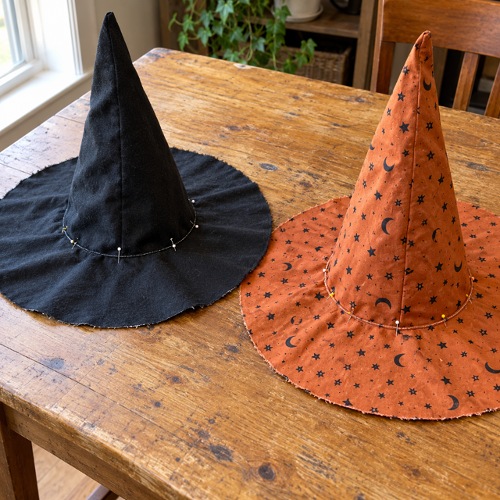
Follow by pinning one brim piece to each cone, keeping the wrong sides together. Match the inner circular edge of the brim to the bottom edge of the cone. Finally, sew around the opening.
Repeat this process for the second fabric layer. Ensure that the fabric edges are aligned before sewing.
Step 5: Join the Two Hat Layers
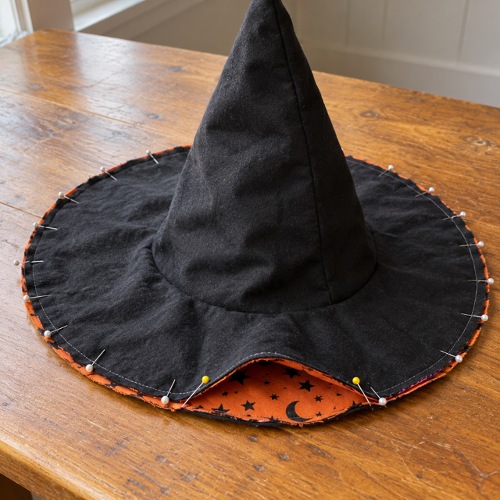
Now place the two hat layers with their right sides facing each other. Match the seams and pin around the outer brim edge. Sew around the perimeter and leave an opening of approximately 6 inches so you can turn the hat right side out.
Turn the hat through the opening, gently pushing out the pointed tip. Press around the brim with an iron, and fold and press the raw edges of the opening inward.
Step 6: Add the Wire to Shape the Brim
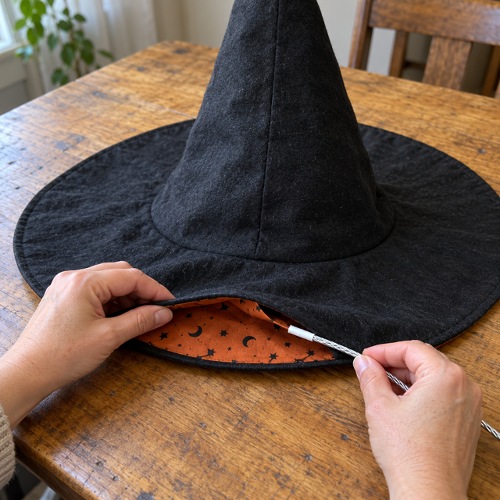
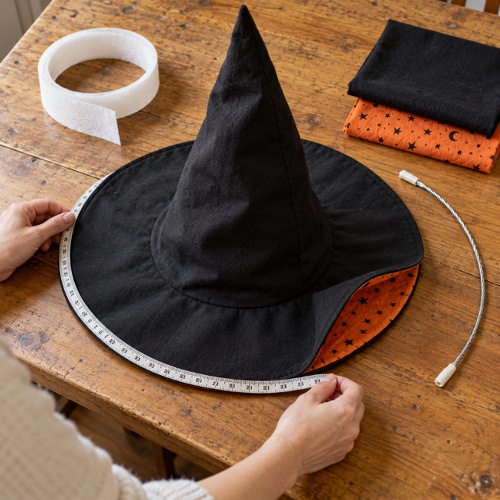
The wire helps the brim keep its shape. Take thick wire and twist four strands together to create one long, sturdy piece. Measure it to match the outer circumference of the brim.
Now, cover the wire ends with tape so there are no sharp edges that could damage the fabric or scratch the wearer. Insert the wire carefully through the 6-inch opening and position it around the outer edge of the brim.
Secure the wire ends together with tape, ensuring that it is smooth and safely covered!
Safety tip: Use wire that bends easily enough to shape but is sturdy enough to support the brim. Keep sharp ends fully covered and don’t let the wire protrude through the fabric.
Step 7: Close the Opening of your
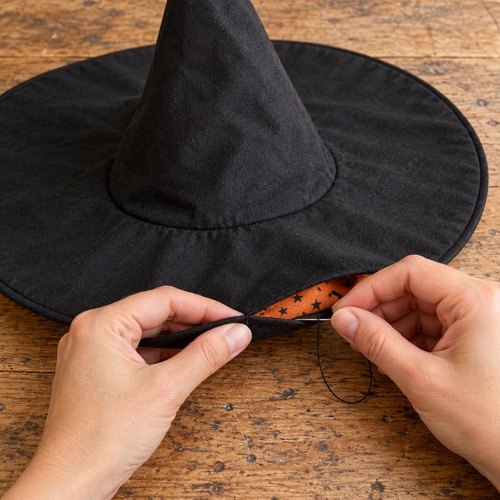
Now that the wire is in place, hand-sew the opening closed using a blind stitch. This hides the stitches and gives the hat a neat, professional finish.
Press the brim one final time if needed, taking care around the wire.
Step 8: Style and Wear Your Reversible Witch Hat
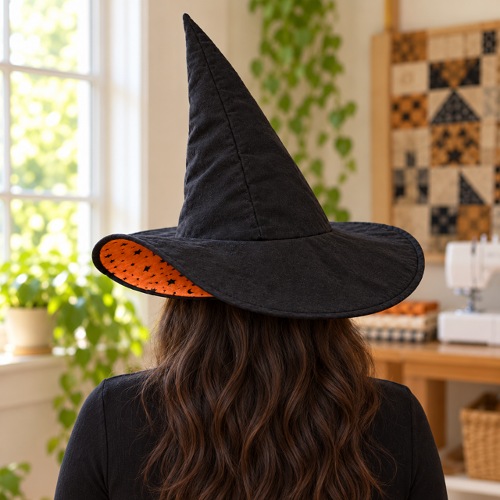
Your reversible witch hat is ready! Wear the black side for a classic Halloween look or turn it inside out to show the contrasting checked fabric.
Tips for Sewing a Reversible Witch Hat
Pick two contrasting fabrics that look attractive on their own so both sides of the hat are wearable. Reduce excess fabric near the tip to help achieve a sharp point.
Add interfacing for structure especially if your fabric is lightweight or the brim needs extra stiffness. Follow the entire outer circumference of the brim while measuring the wire without bunching or pulling the fabric.
Finally, add a blind stitch to keep the reversible hat looking clean on both sides!
Common Mistakes to Avoid When Making a Reversible Witch Hat
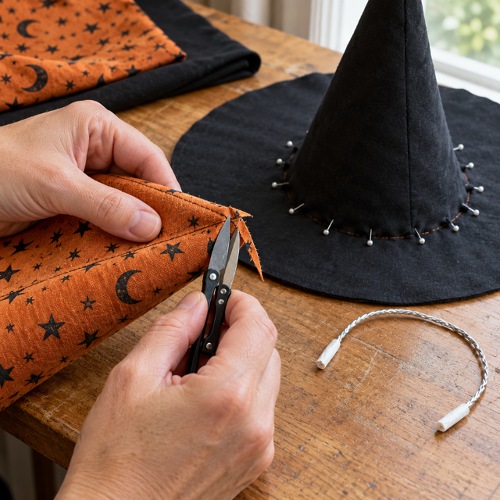
To save yourself from creating a blunt cone tip, trim the seam allowance carefully without cutting the stitching. Match the inner circle of the brim to the cone’s bottom edge and pin evenly before sewing so that they don’t get misaligned!
Measure the outer brim circumference accurately so the wire fits smoothly without distorting the shape and you don’t end up using a very long or very short wire. Cover all wire ends and joins securely with tape to prevent injuries or fabric damage due to exposed sharp wire ends.
Also, don’t close the opening before inserting the wire, leave it accessible until the wire is positioned correctly, then close it with a blind stitch!
Make your Halloween game stronger with an easy-peasy witch hat! Try this Christmas tree drawstring pouch as your next DIY sewing project.