
Nine star blocks, creamy sashing, and a bold floral border! Follow this dashing star quilt pattern tutorial to sew your own today.
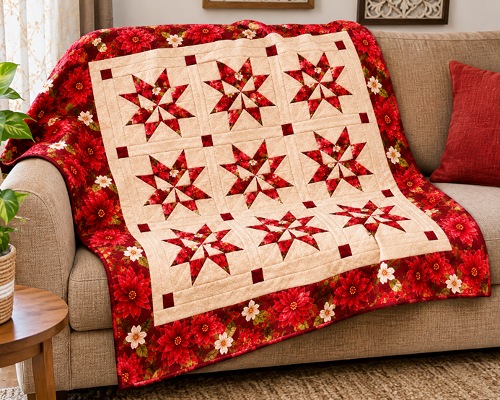
If you’ve been wanting to try a traditional star quilt pattern with a little extra detail, this dashing design is worth adding to your sewing list. In this full tutorial, you’ll learn how to sew and assemble the blocks into a beautiful finished design.
Materials and Supplies
Before you begin, gather the following fabrics and quilting tools.
- Fabric Requirements
- Layer cake: One pack of 10-inch fabric squares.
- Background fabric: 3½ yards, including the sashing and first inner border.
- Outer border fabric: 1¾ yards for a 5½-inch outer border.
- Binding fabric: ¾ yard. A striped fabric makes a lovely finishing touch.
- Backing fabric: 8¼ yards of regular-width fabric or 2¾ yards of 108-inch-wide fabric.
Dashing Star Quilt Pattern Tutorial
Step 1: Choose and Pair Your Fabrics
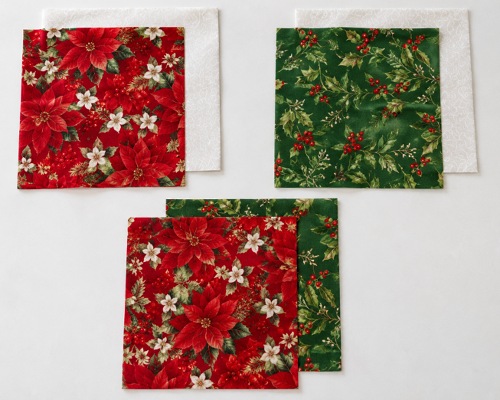
Start by sorting through your layer cake and selecting contrasting fabrics for your star blocks. Here we have used the red and green contrast that helps the star shape stand out clearly.
For each star block, you’ll need:
- Two 10-inch squares of one color
- Two 10-inch squares of a second color, and
- Two 10-inch background squares
Then arrange the squares into 3 pairs. One square of the first color paired with a background square. One square of the second color paired with a background square, and the last one square of the first color paired with one square of the second color.
Place each pair with the right sides of the fabric facing each other. You’ll sew around the edges of these pairs to create the pieces needed for the star.
Step 2: Sew Around Each Pair of Squares
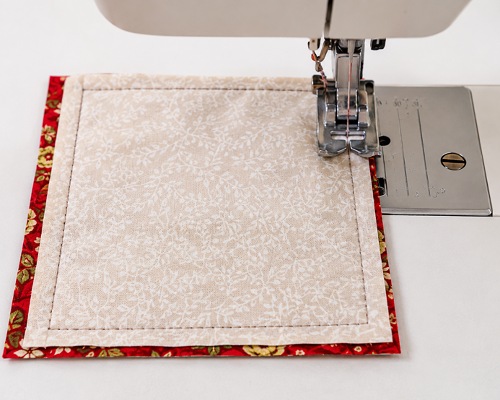
Take the paired fabric squares to your sewing machine. Using a ¼-inch seam allowance, sew completely around the outer edges of each pair. Keep the fabric edges aligned as you sew.
Repeat this process for all three pairs. Make sure to sew around the entire perimeter of each pair rather than sewing only along one side. This is what allows you to cut each pair into four half-square triangles in the next step.
Step 3: Cut the Squares Diagonally
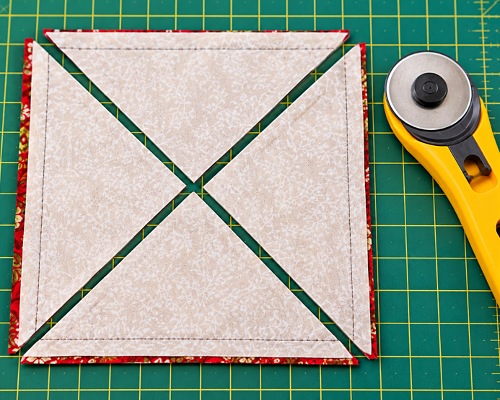
Once you’ve sewn around all three pairs, take them to your cutting mat. Place a pair on the mat and use your quilting ruler and rotary cutter to cut diagonally from one corner to the opposite corner. Then make a second diagonal cut from the remaining two corners.
Each pair will produce four half-square triangle units. Repeat this process with the other two pairs.
You should now have three sets of half-square triangles:
- Red and background
- Green and background
- Red and green
These pieces will form the star’s points and central pinwheel.
Step 4: Trim the Half-Square Triangles to 6½ Inches
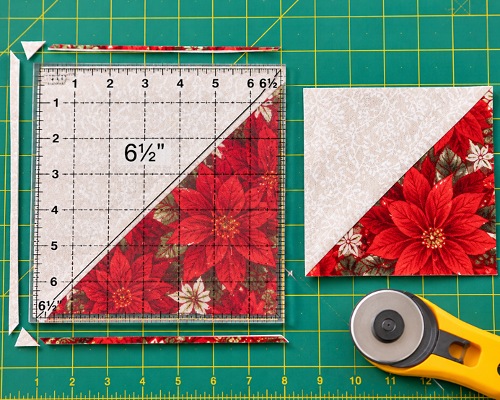
This step is particularly important because accurately trimmed pieces make the quilt block easier to assemble.
Use a square-up ruler or a quilting ruler with a diagonal line to trim each half-square triangle unit to 6½ × 6½ inches. (With the help of a Specialty Trimming Ruler)
If you’re using a ruler designed for half-square triangles, align the diagonal marking on the ruler with the seam running through the center of the unit. Follow the ruler’s markings to trim the unit to 6½ inches.
Trim the necessary edges and corners, keeping the diagonal seam aligned throughout the process.
Using a Standard Quilting Ruler
- You can also use an ordinary square quilting ruler with a diagonal line.
- Place the ruler over the unit, aligning its diagonal line with the stitched seam
- Make sure there is enough fabric beyond the ruler’s edge to trim the unit accurately.
- Trim the first two edges to create a straight corner.
- Turn the unit around.
- Align the ruler’s diagonal line with the seam again, making sure the trimmed corner sits correctly within the 6½-inch markings.
- Trim the remaining edges.
- Repeat until all the half-square triangle units measure 6½ × 6½ inches.
- Take your time with this step. Consistent measurements help the pieces fit together neatly and keep the finished star block square.
Step 5: Cut the Background and Corner Squares
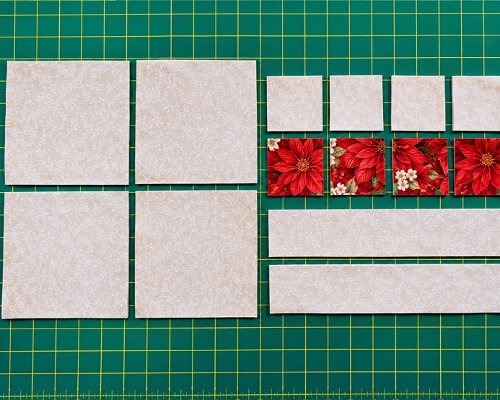
Next, prepare the additional squares needed to assemble the star. From your background fabric, cut 6½-inch-wide strips. Subcut these strips into 6½-inch squares for the outer corners of the block.
For the smaller corner squares, the video mentions 5-inch squares cut diagonally, producing four pieces. However, the transcript does not clearly establish the complete cutting quantity or every placement detail for these pieces. Check the original pattern or video visuals before cutting all your fabric.
Keep the different sizes of squares organized so you can find the right pieces easily during assembly.
Step 6: Arrange the Pieces to Form the Star
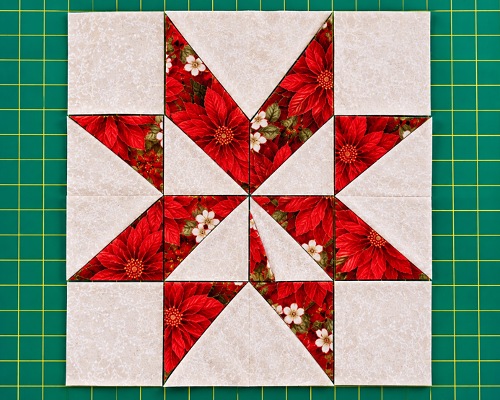
Now comes the fun part: arranging the pieces into the Dashing Star block.
Start by placing the red-and-green half-square triangles in the center. Arrange them to form a large pinwheel. The fabric colors should alternate around the center, creating a light-dark-light-dark arrangement. Check that the seams and diagonal lines flow toward the middle of the pinwheel.
Next, arrange the remaining half-square triangles around the center to create the star’s four arms. The red-and-background and green-and-background pieces form the long sections of the star. Position them so the contrasting colors create clear, continuous star points.
Finally, place the corner squares at the outer edges of the block. Before sewing anything together, step back and check the arrangement against the finished block you want to create. Make sure the star points face outward, and the colors form the intended pattern.
Take a photo of your layout before you start sewing. It gives you a quick reference if any pieces get moved.
Step 7: Sew the Center Pinwheel
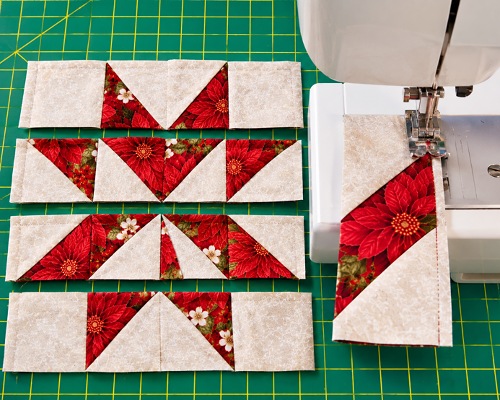
Begin assembling the block at the center. Join the half-square triangle units that form the pinwheel, using a ¼-inch seam allowance. Sew the pieces together in pairs first, then join the pairs to complete the center.
As you sew, pay attention to the seam intersections. The goal is to keep the diagonal lines meeting neatly at the center.
Press the seams so they lie flat. Where possible, press adjoining seams in opposite directions so they nest together when the pieces are joined.
You don’t need to force every seam to press in one particular direction. Choose the direction that helps the seams fit together neatly and reduces bulk.
Step 8: Attach the Star’s Arms
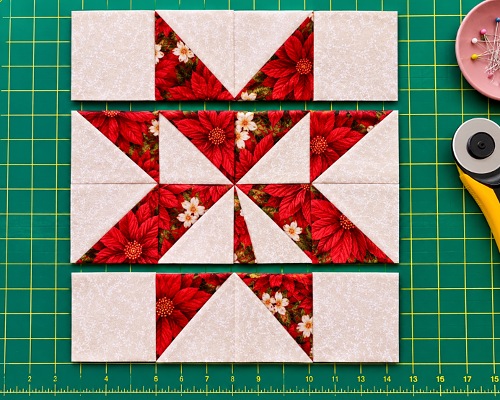
Once the center pinwheel is assembled, it’s time to add the star’s arms. Arrange the remaining half-square triangle units into matching pairs, checking that the red and green sections create the intended star-leg pattern.
Sew the units together in pairs, using a ¼-inch seam allowance. If you have several identical pieces to sew, you can chain-piece them to save time.
Chain-piecing means sewing one pair after another without cutting the thread between every pair. Leave a small gap between pieces, then cut them apart when you’re finished.
After preparing the pairs, attach the star sections to either side of the center pinwheel.
Match the seams carefully, particularly where the center sections meet. Pin or clip the pieces if needed to prevent the fabric from shifting.
Press the seams after sewing!
Step 9: Assemble the Top and Bottom Rows
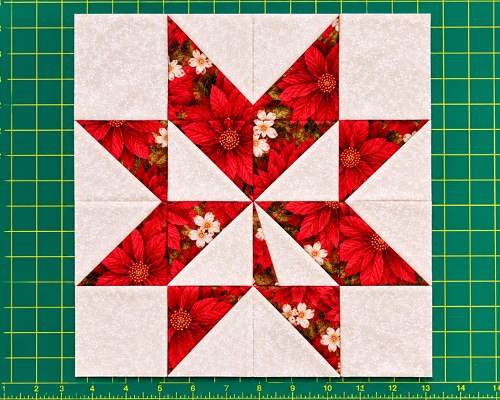
With the center and star-arm sections prepared, assemble the top and bottom portions of the block.
Take the pieces intended for the bottom row and sew a corner square to each outer section. Make sure the corner squares sit at the outside edges rather than facing inward.
Repeat the process for the top row.
Before sewing, double-check the placement of each corner. Turning a piece around while handling the fabric can make it easy to put a square in the wrong position.
Once the top and bottom rows are ready, join the sections to the center assembly. Match the seams and keep the fabric edges aligned as you sew. Press the seams after joining the sections.
When everything is assembled correctly, you’ll see the large star shape emerge.
Step 10: Press and Check the Finished Block
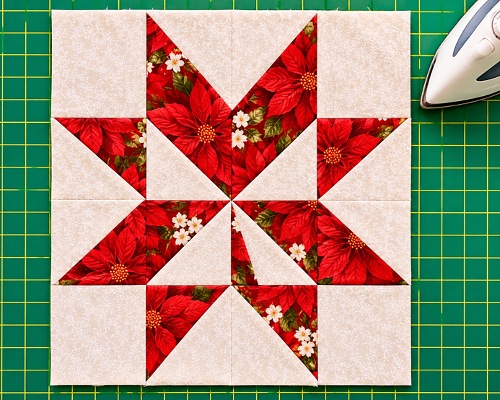
Open the block and give it a final press.
Check that the seams lie flat and the star points are properly aligned. If the block looks slightly uneven, measure it before moving on to the next step.
The finished block should measure approximately 24½ × 24½ inches, including seam allowances. This unfinished measurement allows for the seam allowances needed when the blocks are joined with sashing.
Once assembled into the quilt top, the finished block will measure approximately 24 inches.
If your block measures differently, double-check the measurements of your half-square triangles and the accuracy of your seam allowances before continuing.
Repeat the same process to make a total of nine Dashing Star blocks.
Step 11: Join the Star Blocks With Sashing
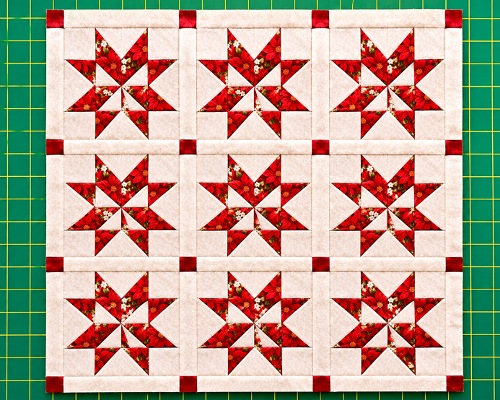
Once all nine star blocks are complete, arrange them in three rows of three. Position the blocks so the colors and star patterns work together across the quilt top.
Cut the sashing strips from your background fabric. The tutorial specifies 24½-inch sashing strips to fit between the unfinished 24½-inch star blocks. Sew a sashing strip between adjacent blocks in each row.
Next, prepare the horizontal sashing rows that will run between the three rows of stars. These include the sashing strips and small cornerstone squares.
Arrange the cornerstone squares and sashing strips in the intended order before sewing. This helps maintain the secondary pattern across the quilt.
Join the blocks and sashing carefully, matching seams wherever the pieces intersect.
Step 12: Add the Borders
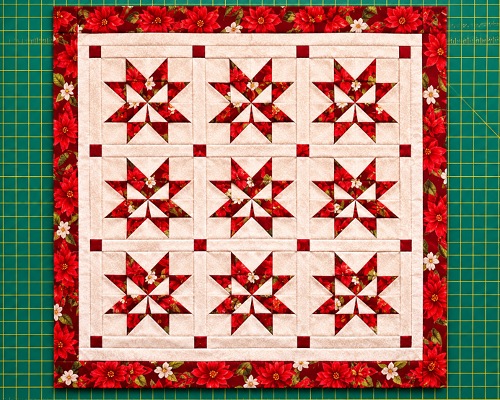
After joining the nine blocks and sashing, your quilt top is ready for its borders. The original tutorial includes:
- An inner border cut from the background fabric
- An outer border cut from the designated border fabric
- The background fabric requirement of 3½ yards includes the sashing and first inner border. The outer border uses 1¾ yards of fabric and is described as a 5½-inch border.
Measure the quilt top before cutting the border strips. This helps you determine the appropriate lengths and keeps the finished quilt square.
Sew the inner border to the quilt top first, followed by the outer border. Press the seams after attaching each border.
The completed quilt top should have nine oversized stars framed by the borders, with the secondary Shoofly-style pattern visible between the blocks.
Step 13: Prepare the Quilt for Finishing
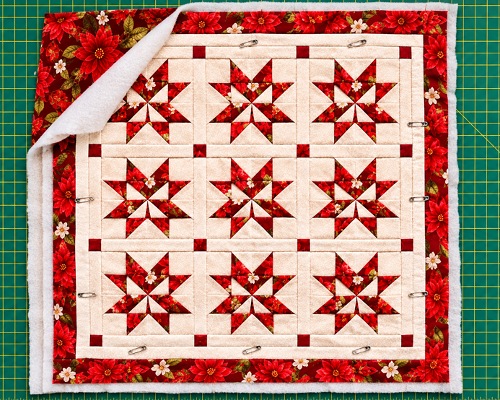
Once the quilt top is complete, prepare the backing fabric and binding. The original tutorial uses a neutral backing that complements the front without distracting from the star pattern.
You can use 8¼ yards of regular-width backing fabric or 2¾ yards of 108-inch-wide fabric, as specified in the video. Layer the backing, batting, and quilt top together, smoothing out wrinkles and securing the layers before quilting. Quilt the layers using your preferred method.
Finally, bind the quilt using your chosen binding fabric. The tutorial recommends ¾ yard and highlights striped binding as an attractive finishing option. Once the binding is attached, your Dashing Star Quilt is complete!