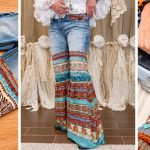

Give your old jeans a second chance with this stylish DIY flared denim tutorial. Create trendy bell-bottoms and refresh your wardrobe.
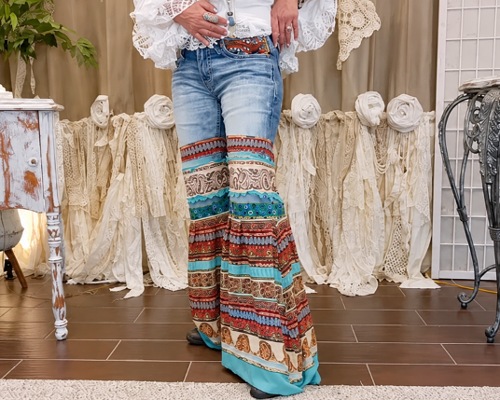
This easy sewing project will make your upcycled denims look unique and dressy. Pick a thrifted dress, leftover fabric, and vintage lace to transform your ordinary jeans into unique boho-inspired, stylish flared denim.
Materials and Supplies Needed
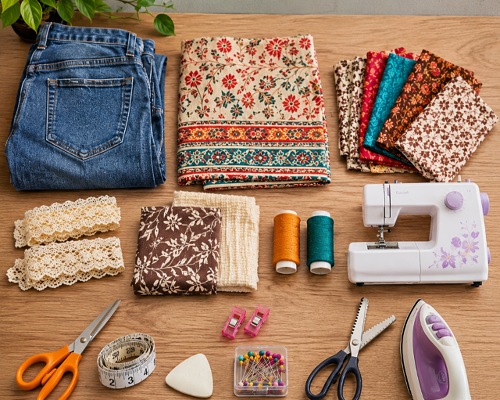
- An old pair of jeans (men’s jeans, skinny jeans or denim capris)
- A thrifted dress or printed fabric for the flared sections
- Coordinating fabric scraps for decorative bands
- Vintage lace or lace trims
- Scrap fabric or an old patterned towel for pocket embellishments
- Matching or contrasting sewing thread
- Sewing machine
- Fabric scissors
- Measuring tape or ruler
- Tailor’s chalk or fabric marker
- Sewing pins or clips
- Pinking shears (optional, for finishing raw fabric edges)
- Iron and ironing board
Step-By-Step Tutorial for Upcycled Denim
Step 1: Prepare and Shorten the Jeans
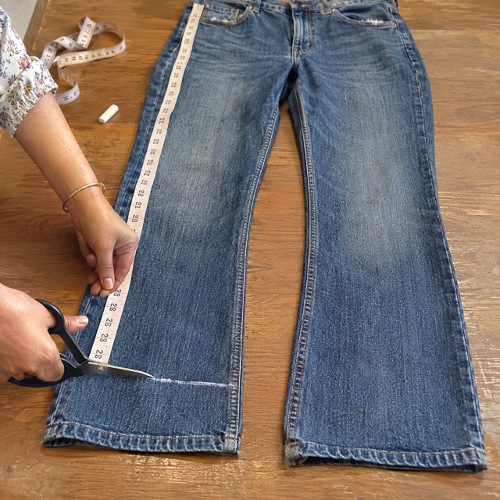
Pick a pair of old jeans that you would like to upcycle. Try them on and decide where you want the flared sections to begin.
Or you can measure 17 inches from the bottom of each pant leg and mark the cutting line all the way around. Use tailor’s chalk to make small marks on the front and back of both legs!
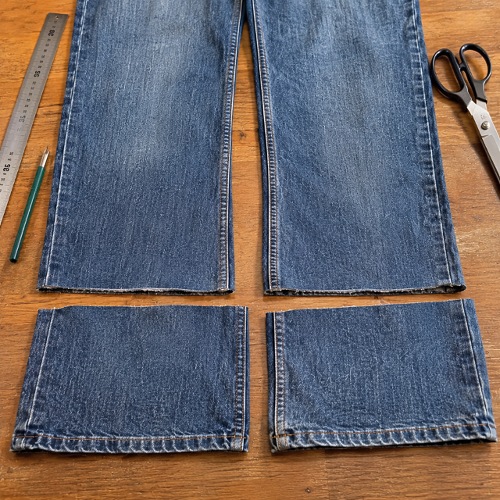
Cut along the marked lines to remove the bottom sections. Keep these pieces aside, as you will use them to create the flared extensions.
Step 2: Cut the Fabric For the Flared Sections
Now, take your thrifted dress and measure 17½ inches from the bottom to account for a ½-inch seam allowance.
Cut off the bottom section of the dress. Divide this fabric into two equal pieces by cutting along the existing side seams. Each piece will form the flared extension for one pant leg!
Step 3: Sew the Flared Fabric Pieces
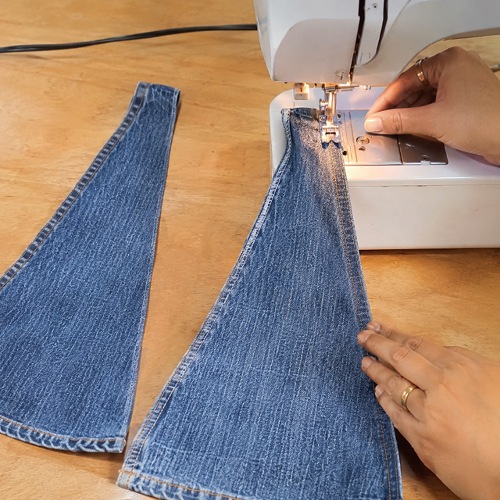
Next, fold each fabric piece in half with the right sides facing each other. Align the edges and sew along the open side using a straight stitch and a ½-inch seam allowance.
Once sewn, trim the excess fabric close to the seam using pinking shears.
This helps reduce fraying and gives the fabric edge a neat finish.
Press the seams with an iron.
Step 4: Add Decorative Fabric Bands
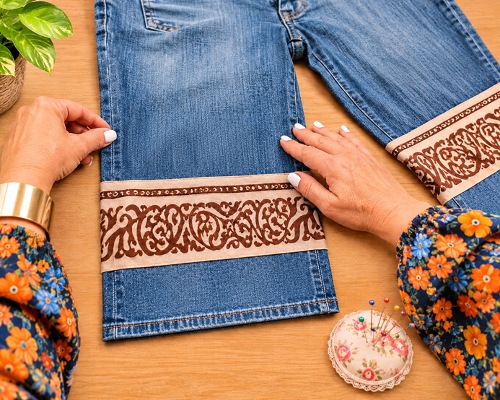
Cut coordinating fabric strips to make decorative bands around the lower portion of the jeans. Start with the first strip near the bottom of the denim. Use a ruler and tailor’s chalk to mark a ½-inch guideline around the pant leg.
Fold the raw edge of the fabric strip inward and align it with the marked line. Use a zigzag stitch to attach the strip to the jeans, following the chalk marks.
Now, overlap the ends slightly and secure them with stitching. Repeat the process along the opposite edge of the band to get a neat finish!
Step 5: Attach the Second Decorative Band
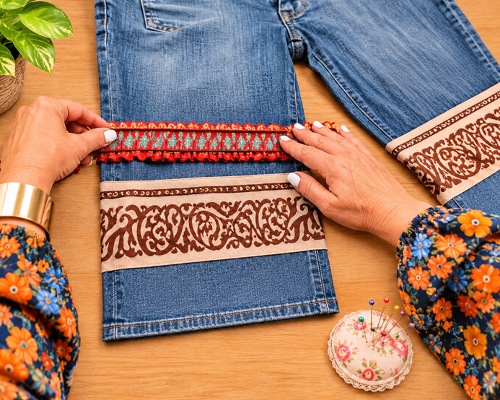
Measure approximately 3 inches up from the bottom of the jeans and mark the position for the next fabric strip.
Instead of sewing one continuous strip around the entire leg, attach separate sections, starting and finishing near the seams.
This helps prevent the fabric from shifting or becoming puckered.
Then fold the ends of each strip inward and secure them using a zigzag stitch.
Step 6: Add Another Fabric Strip With Small Denim Gaps
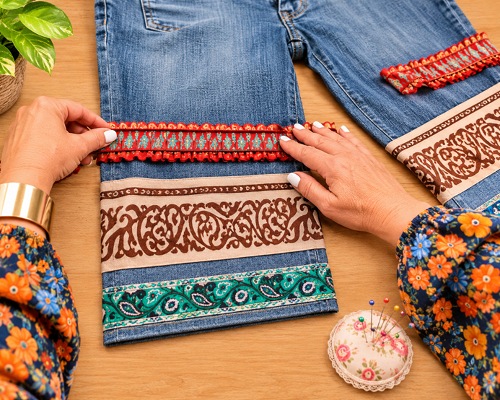
Take another coordinating fabric strip and mark a position approximately 7½ inches above the bottom of the jeans.
Attach the strip around the pant leg using a zigzag stitch. Leave small gaps of exposed denim between sections to form visual contrast and connect the decorative fabric with the original jeans.
These little denim details help the different fabrics blend together beautifully.
Step 7: Decorate the Fabric Bands With Lace
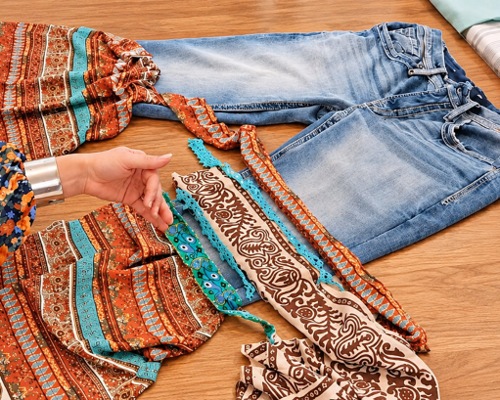
Use leftover lace to add another decorative layer to the jeans.
Position the lace along the edges of the fabric bands, slightly covering the raw edges. Sew it in place using a straight or zigzag stitch, following the curves of the pant leg.
You can use contrasting lace colours to create a more distinctive bohemian look!
Step 8: Embellish the Pockets
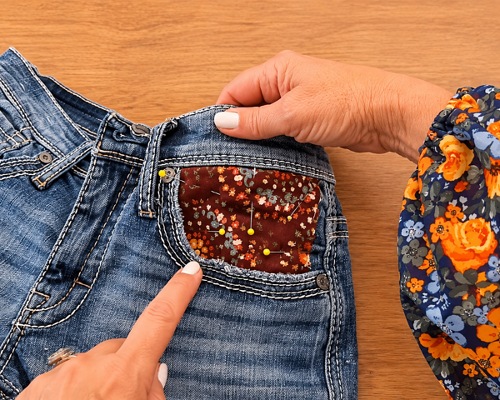
It’s time to give the front and back pockets a makeover using small pieces of vintage fabric!
Cut fabric scraps to fit the pocket areas and pin them in place. Allow the fabric to overlap the pocket edges slightly. Use a zigzag stitch around the perimeter to secure the decorative pieces.
Make sure you do not accidentally stitch the pocket opening closed.
Step 9: Attach the Flared Fabric to the Jeans
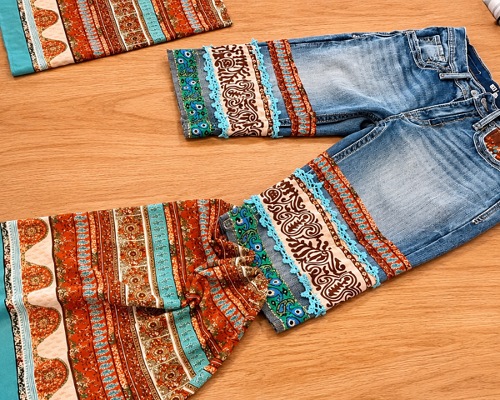
Now it’s time to join the flared sections to the denim.
Turn the jeans inside out and turn the flared fabric pieces so their right sides face the right side of the denim. Slide each fabric extension over the corresponding pant leg, matching the side seams carefully. Pin the two seams together first.
Next, find the opposite points between the seams and pin them. Continue dividing the fabric evenly into smaller sections until the excess fabric is distributed into neat pleats.
Once everything is pinned, sew around the pant leg using a straight stitch and a ½-inch seam allowance. Fold each pleat as you sew to keep the gathers evenly spaced.
Step 10: Press and Finish the Seams
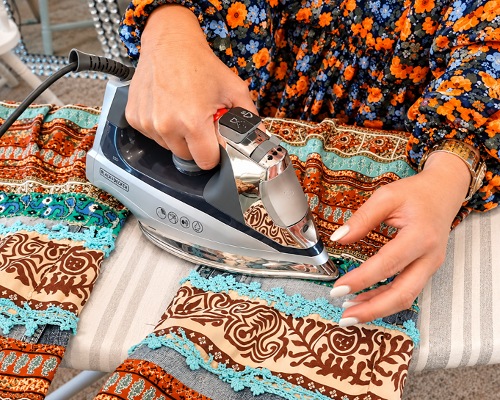
Turn the jeans right side out and press the newly attached seam with an iron.
If your fabric is lightweight and falls naturally, you may not need any additional finishing.
However, if the fabric is thick or the seam looks bulky, sew a line of topstitching approximately ⅛ inch below the seam, catching the seam allowance underneath.
This helps the seam lie flatter and gives the flared section a cleaner finish.
Your DIY boho flare jeans are ready to wear!
Tips for Making Upcycled Denim
Choose lightweight, soft, and flowy fabrics for the flares. It will bring beautiful movement and prevent the bottom of the jeans from looking too bulky! Plan your fabric placement by arranging the fabric strips, lace, and embellishments around the jeans before sewing.
Combine contrasting prints like florals, vintage patterns, denim, and lace for an authentic bohemian look. Use a zigzag stitch for decorative bands as it gives more flexibility than a straight stitch, especially when working with stretch denim!
Distribute the pleats evenly by pinning the fabric at the seams and centre points before sewing to get a balanced flare.
Note: Remember to include seam allowance when measuring the fabric extensions.
Ready to give your jeans a boho upgrade? Try this easy ruffles tutorial and pick this as your next DIY makeover project!