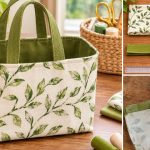

Make your room more organized with this easy-to-sew hanging fabric basket at home. Perfect for new learners!

A few pieces of fabric, some interfacing, and a simple strap, and suddenly you’ve got a DIY hanging fabric basket that hangs right on the wall! This basket is a fun way to reclaim unused wall space.
Essentials That You’ll Need

To make this hanging fabric basket, you’ll need a sturdy cotton for the outer fabric and a softer cotton for the lining. You’ll also need light-to-medium fusible interfacing, matching thread, and a two-page printable pattern.
Then keep a sewing machine, an iron and ironing board, a ruler, scissors or a rotary cutter, and pins or clips handy.
A few extras are optional but useful. A safety pin or bodkin helps turn the strap right side out, a pressing ham or tailor’s ham helps with smoothing the curves, and heavier interfacing is worth having if you want the basket to carry heavier items.
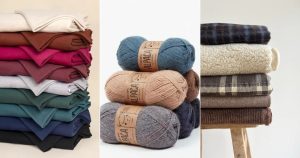
Start by choosing cotton fabrics that press well, then mix and match your prints to suit your space. If your basket will hang in a damp kitchen, a waterproof fabric like PUL or coated canvas is a better choice, since it helps prevent mold and odors.
DIY Hanging Fabric Basket
Follow these instructions to make your very own hanging fabric basket.
1. Choose and Prepare Your Fabric

Pick your outer fabric and your lining, and decide how sturdy you want your basket to be. Lightweight interfacing is fine for craft storage, like embroidery floss. Medium or heavy interfacing holds up better for denser items, like produce.
Pro Tip: Press each piece of fabric flat before you begin, so you’re working with smooth layers and your pieces cut out accurately.
2. Cut Your Pieces

Print your pattern and assemble it. When you place the pattern on the fold, check carefully which edge is the true fold. The long edge you see on the printed diamond is the cut edge, and the opposite short edge is the fold. If you cut on the wrong side, you still get the same diamond shape, but your seam ends up in the wrong place.
Cut the main fabric and the lining, then cut a strap 14 inches by 3.5 inches.
Note: The fold edge decides where the rear seam sits on the finished basket, so take a moment to double-check before you cut.
3. Fuse the Interfacing

Combine the interfacing to the wrong side of your fabric, pressing from the center outward so it doesn’t pucker or pull. Then to the strap too, which gives the hanging point extra strength and helps it resist stretching over time.
If you’d like a stiffer basket, fuse interfacing to both the main pieces and the lining, or use a heavier interfacing on the main fabric. If you’d like a stronger strap, fuse interfacing to both strap layers.
Quick Advice: Lightweight interfacing gives your basket shape, but it will bow under a lot of weight. Pick the weight based on what you plan to store.
4. Sew the Side Seams and Box the Corners

Stitch each basket piece down the long side with a 3/8 inch seam allowance. If you’re sewing both pieces, chainstitch them one after the other to save thread and avoid rethreading the machine. Press the seams open, since open seams reduce the bulk in the boxed corners.
To box the corners, flatten each corner so the side seam lines up with the bottom seam. Stitch straight across about 1/4 inch from the point. This turns the flat diamond into a three-dimensional basket with a base that stands up on its own.
5. Make the Strap

Fold the strap in half lengthwise, right sides together, and sew it with a 3/8 inch seam allowance, backstitching at the start and the end. Turn it right side out with a safety pin or a bodkin, then press it flat. The seam can sit in the center or be hidden, depending on the look you like.
Quick Advice: An interfaced strap is harder to start turning. Push the first section through, and then pull the rest.
6. Assemble, Turn, and Topstitch the Basket

Place the main fabric and the lining right sides together, with the strap tucked in between. Position the strap ends about 1 inch to either side of the rear seam, so the strap is centered, and its raw ends are hidden in the seam allowance. Pin carefully, so the strap is caught evenly.
Sew around the edge, leaving an opening along a straight edge. Avoid leaving it in a curve or a valley, because a straight edge is much easier to finish neatly. Trim the bulk, turn the basket right side out through the opening, and push the corners out gently.
Then topstitch around the top edge. This closes the opening and strengthens the rim, so the basket holds up to everyday use.
Tips and Few Mistakes to Avoid

Check the fold before you cut. Cutting the pattern on the wrong edge is one of the most common mistakes. The fix is simply to confirm which edge is the fold before the scissors come out.
Make sure the strap is caught in the seam. If a strap end slips out, unpick the seam and put the strap back about 1 inch from the rear seam.
Press your seams open before you topstitch. If your seams look puckered after turning, pressing them open and using a pressing ham usually smooths them out.
Match the interfacing to what you want to store. Heavier interfacing makes a sturdier basket, but it also makes turning harder. So, you may need a stronger turning tool.
For extra strength, use webbing for the strap or add a rivet at the strap seam. A 14-inch strap suits most standard wall hooks.
This DIY hanging fabric basket is a fun way to turn fabric scraps into useful storage. You can try these easy-to-make no-sew fabric stars for the upcoming holiday home decor collection!