
Decorate your home with this easy-to-make DIY angel decoration for Christmas this year, with all the steps and details to help you through the process smoothly!
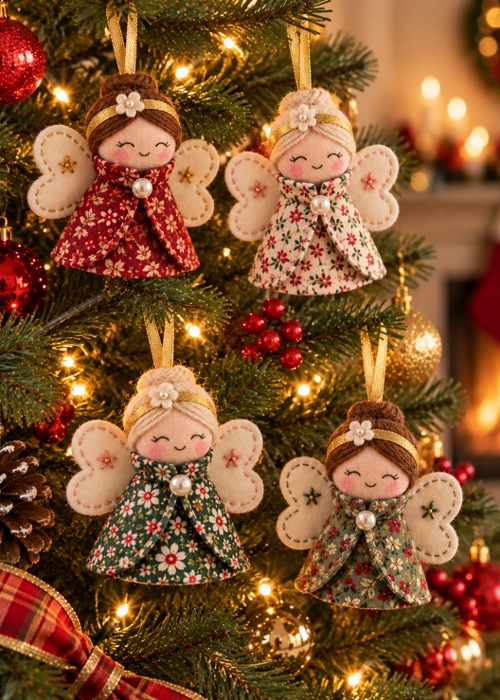
What if those leftover fabric scraps could become the sweetest little decorations on your tree? With a few folds, some simple stitching, and a little ribbon, you can turn it into an angel with delicate wings and a tiny hanging loop. In this tutorial, you’ll learn how to sew an angel decoration pattern in 7 easy steps, from cutting the fabric pieces to assembling the angel.
Essentials That You’ll Need
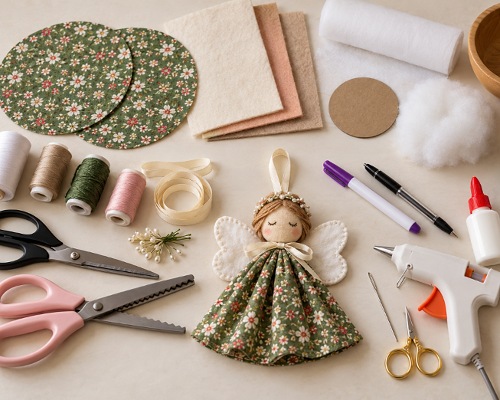
To make this angel decoration, you’ll need two circles of cotton fabric for the body, plus felt for the face and wings. Interfacing, such as Vlieseline G700, is optional but helpful for giving the body some shape.
For the head, you’ll need a thin card circle and a little wadding or fleece, slightly larger than the card. You’ll also want strong thread for gathering, embroidery thread for the wings, and ribbon for the hanger and headband.
Then, keep a bowl to use as a circle template, an erasable heat pen, a biro, an iron, and a sewing machine handy. A large hand needle works well for stitching felt, and small scissors help with the details. Pinking shears are optional.
For glue, use wet fabric glue or a hot glue gun. Hot glue dries the fastest. Start by choosing a cotton print for the body and soft felt for the face and wings, or mix and match scraps for a more eclectic look.
How to Sew an Angel Decoration in 7 Steps
Follow these instructions to make your very own angel decoration.
1. Cut and Stabilize the Body Circles
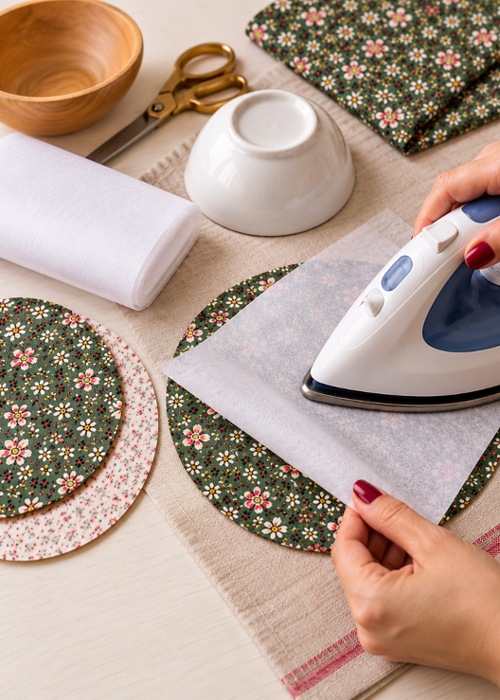
If you’re using interfacing, iron it onto the wrong side of one of your body fabric pieces first. This stiffens the thin cotton, so your angel holds its shape, and the body doesn’t collapse under the weight of the head.
Stack your two fabric layers with the right sides together, trace around a bowl on the top layer, and cut through both layers at once. This gives you two identical circles.
Quick Advice: If your fabric has a direction to its print, line it up in the same direction on both layers before you cut.
2. Sew the Angel’s Body
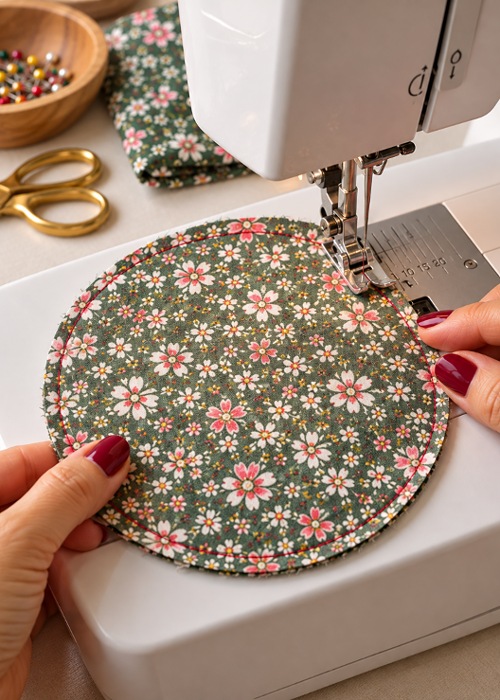
With the circles still right sides together, sew all the way around the edge using a 1/4 inch seam allowance. A presser foot with a guide helps keep the curve even, and if the curves feel tricky, stitch slowly and rotate the fabric with the needle down.
Trim the seam allowance down to about 1/8 inch, which reduces bulk and gives you a smoother curve. Then cut a small slit in the top fabric layer only, turn the body right side out through the slit, and press it flat. Topstitching is optional if you’d like a decorative touch.
Note: Placing the slit in the top layer is a good trick. Its raw edge ends up hidden under the collar at the back, so there’s no visible repair on the angel’s front.
3. Make the Padded Head
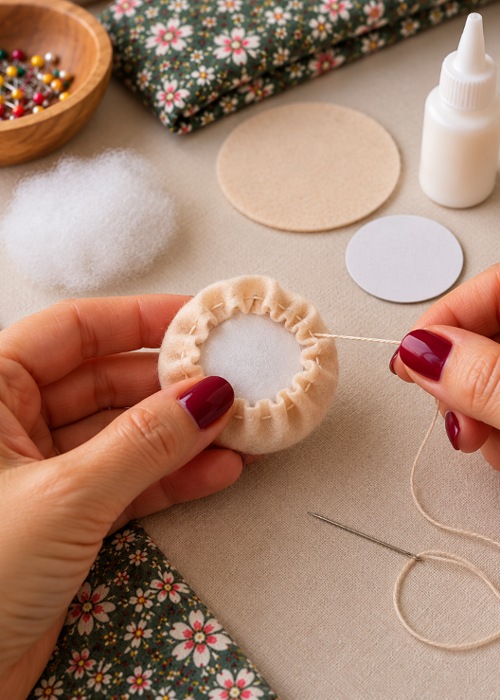
Trim a piece of wadding so it’s slightly larger than your card circle, then glue it to the card with a small dollop of wet glue. This makes a padded core for the head.
Thread a strong needle and sew a loose running stitch around the edge of your felt circle. It doesn’t need to be neat. Place the padded card face down on the wrong side of the felt, then pull the thread tight to gather the felt around it, and knot it twice to secure. The gathered side becomes the back of the head, and it will be glued to the body later.
Quick Advice: Gathering the felt around a padded card gives you a nicely rounded face without any heavy stuffing.
4. Add the Headband and the Face
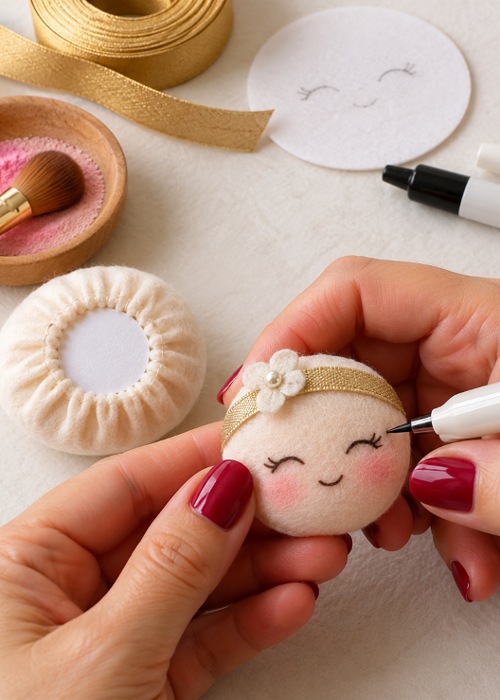
Glue a length of ribbon around the head, near the top and just above where the eyes will go. It covers the gathered seam and gives the head a sweet finishing touch.
Draw the face with an erasable heat pen first, so you can change your mind. Once you like the expression, go over it with a biro to make it permanent. Dab a little powder blush onto the cheeks with your finger. Tiny dots, closed arched eyes, or an open mouth all give your angel a different character with hardly any stitching.
5. Cut and Stitch the Wings
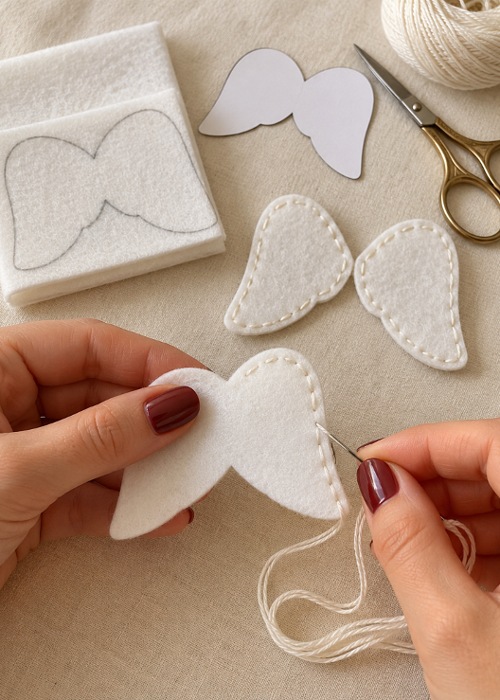
Use a template about 2 inches (5 cm) wide at the top to draw a rounded shape on a piece of felt that’s been folded in half. Turn the template 90 degrees to draw a second lobe next to the first, which makes a heart-like wing shape. Cut through both layers to get two matching wings.
Decorate the wings with a hand running stitch around the edge, using four strands of embroidery thread for a bit of texture. If you’d like a cross-stitch accent, add it before you stitch the edges together, so the knot sits between the two layers of felt.
Pro Tip: To hide the knot in a cross-stitch, start with the knot between the felt layers, make one long diagonal stitch across the cross, then bring the needle back at the corner of an imagined box to finish the cross.
6. Assemble the Cloak and the Hanger
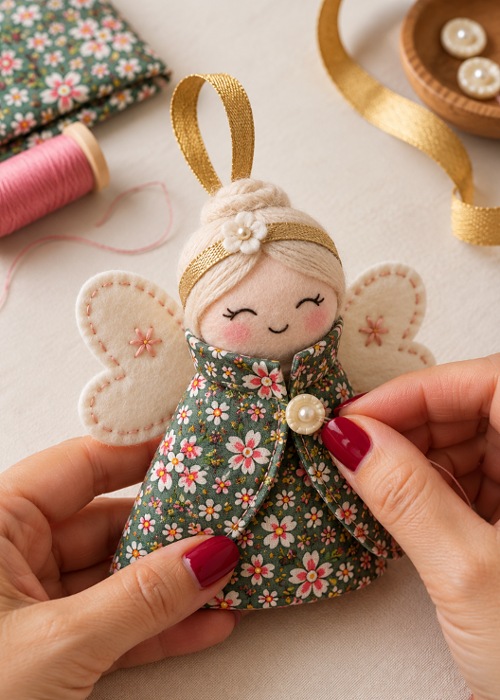
Fold the top opening of the body inward by about 1 to 1.5 inches (2.5 to 3.8 cm). This forms a collar that will hide the base of the head. Glue the folded edges, wrap the front panels so the points meet, and secure them with a few hand stitches. A small button or a tassel at the front is a pretty option.
Cut a piece of ribbon about 9 inches (23 cm) long for the hanger, and make sure it isn’t twisted. Glue it into the center back before you attach the head, so it stays out of sight.
7. Glue It All Together
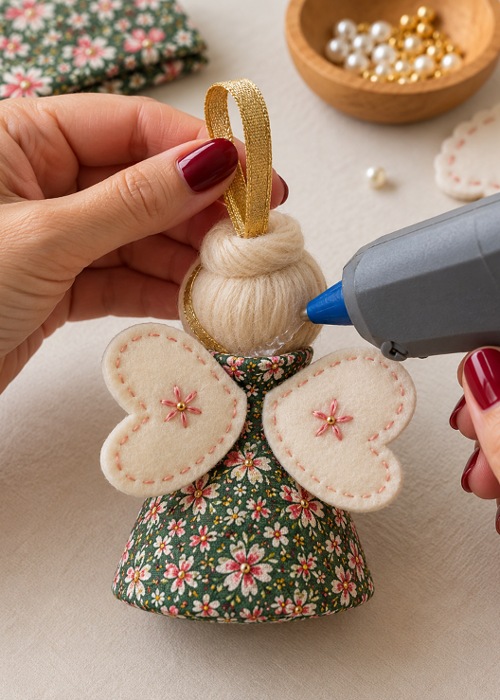
Glue the ribbon loop to the center back and let it tack. Then add a generous amount of glue around the back of the head and press it, face down, onto the collar area until it holds.
Glue the wings next. Put a bead of glue down the center of the wings and position them at the center back, then glue under the wing edges so they stick to the cloak seam. This gives the wings a little lift. Let everything set fully before you hang your angel. Hot glue speeds this up.
Note: If you’re using hot glue, work promptly, since it sets quickly, and handle the glue gun carefully.
Tips and Few Mistakes to Avoid
Use interfacing on at least one body layer. It keeps the angel sturdy, and it also helps the fabric resist fraying when you trim the seam allowance close. Trim the seam allowance to about 1/8 inch (3 mm) before you turn the body. Leaving it wider makes the curve bulky and harder to press flat.
Pre-mark any decorative wing stitches with the heat pen if you’d like a guide. Iron the marks away when you’re done, so no lines remain.
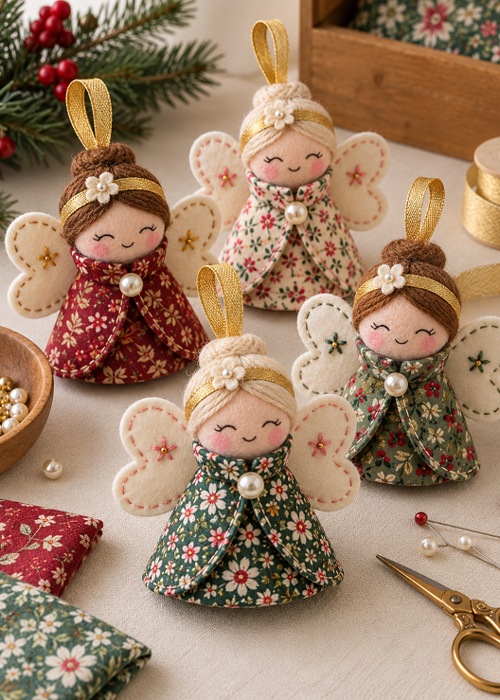
Mix up your angels. Try different face expressions, fabric colors, and even yarn for hair, and each one will look unique. If you like how they turn out, make several and hang them along a ribbon as a bunting. The steps stay exactly the same, so it’s easy to batch them.
This DIY angel is a fun, budget-friendly way to turn leftover fabric and felt into something festive. You can even try this no-sew fabric star design if you want to add some variation to your collection!