
Here’s a cute quilted angel Christmas ornament to decorate your home this festive season. Read till the end to learn more!
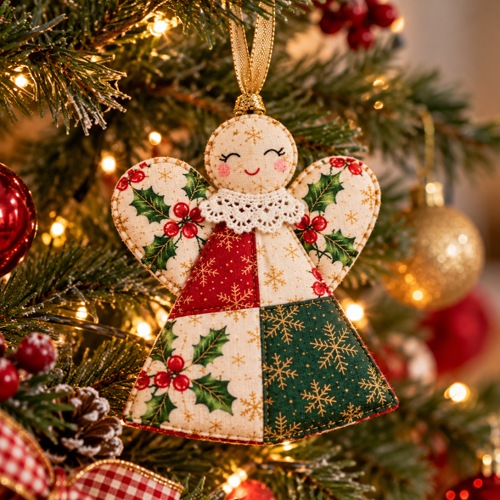
Are you looking to make a DIY quilted angel Christmas ornament? You can use this step-by-step tutorial. It includes a complete list of materials and techniques so that you can make this in a finished-edge or raw-edge version.
Materials You’ll Need to Begin
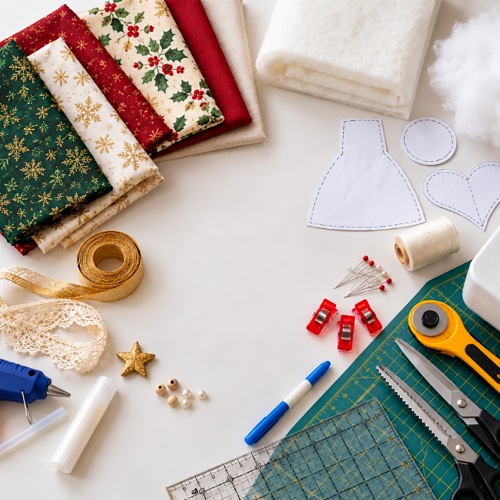
1. Fabric and Quilting
- Four coordinating fabric pieces for the body
- Fabric for the back of the body
- Fabric for the head and its backing
- Two fabric pieces for the heart-shaped wings
- Batting or quilt wadding
- Poly-Fill stuffing for lightly stuffed wings
2. Cutting and Sewing
- Printed paper templates: body, head, and heart
- Sewing machine and thread
- Rotary cutter or fabric scissors
- Pinking shears
- Ruler and cutting mat
- Straight pins or fabric clips
- Iron and ironing board
- Blunt-ended pen or pencil for turning fabric
3. Assembly and Decoration
- Ribbon for the hanging loop
- Fabric glue or hot glue gun
- Glue stick for temporarily positioning the small head template
- Optional lace for collar
- Optional decorative appliqué or embellishments
4. Prerequisites
To reach a 5.5 × 7-inch finish, however, you must have prior knowledge of fabric layering, quilting, cutting, and assembling.
Quilted Angel Christmas Ornament Steps
Exact Measurements:
- Four-patch body: Four fabric pieces, each 3 × 4 inches
- Seam allowance: ¼ inch for the four-patch seams
- Paper templates: Three shapes: body, head, and heart-shaped wings
- Body and head: Backing fabric, top fabric, and batting
- Wings: Two fabric layers; optional light stuffing or a batting layer
- Hanging loop: Ribbon folded in half and knotted at the cut ends
Step 1: Make the Four-Patch Body
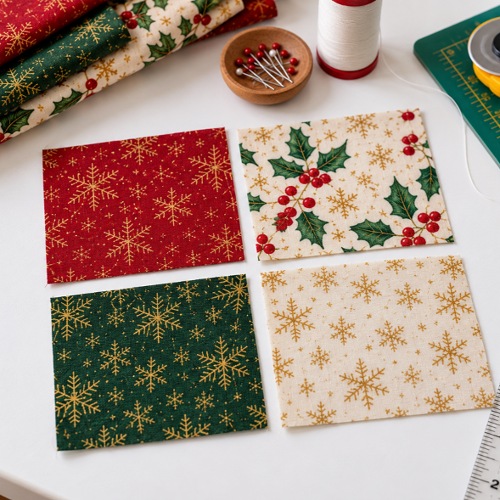
Start by cutting four fabric pieces measuring 3 × 4 inches. Place them in the order of colors you want for the angel’s body.
Now, sew two pairs together along their longer edges with a ¼-inch seam allowance. Press the seams toward the darker fabrics, place the centre seams, and sew the two halves together to form a four-patch block.
Beginner Tip: Place your fabrics on the table beforehand so you can check the pattern and colour placement.
Step 2: Cut and Sew the Angel’s Body
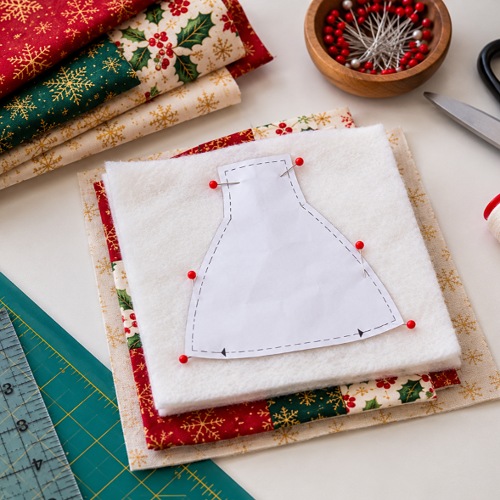
Layer the backing fabric with its right side facing up; place the four-patch on top with its right side facing down. Add batting above the layers. Place the paper body template and pin everything together.
Stitch close to the template; start and stop at the marked arrows to leave an opening for turning. Remove the template and trim the excess fabric!
Step 3: Turn and Finish the Body
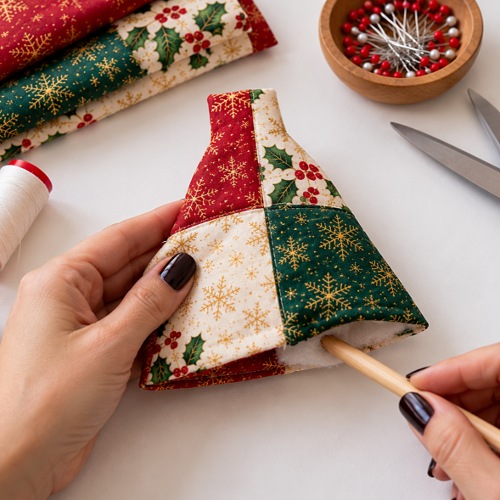
Now, turn the body right side out through the opening. Use a blunt tool to ease the seams into shape without piercing the fabric.
Tuck the raw edges of the opening inside, press the body flat and ensure the edges are neat.
Step 4: Make the Angel’s Head
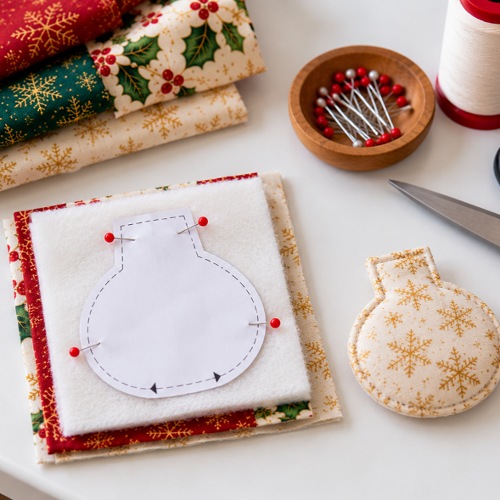
Next, layer the backing fabric, top fabric, and batting in the correct order. Place the smaller head template and temporarily secure it with a glue stick.
Leave the marked opening and sew around the template. Remove the paper, trim carefully, and turn the head right side out.
Finally, tuck the opening inside before attaching the head to the body.
Step 5: Form the Heart-Shaped Wings
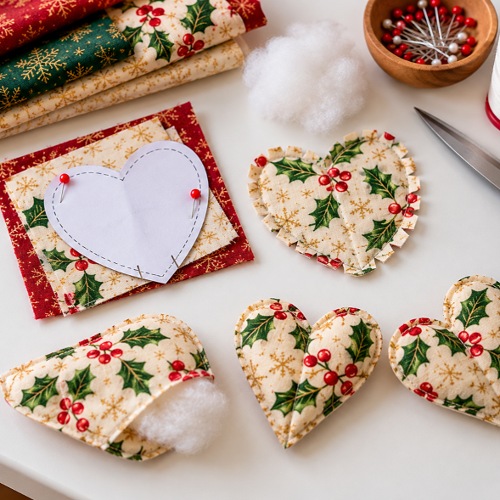
Now, place the backing fabric right side up and the top fabric right side down. Leave an opening, place the heart template, and stitch around it.
Trim the excess fabric, clip the point, and make small relief cuts where needed without cutting the stitches. Turn the heart right side out, tuck the opening inside, and press.
Pro Tip: Insert a small amount of Poly-Fil stuffing. Stitch around the edge to close the opening, then sew a straight line down the centre of the heart.
Step 6: Assemble and Decorate the Angel
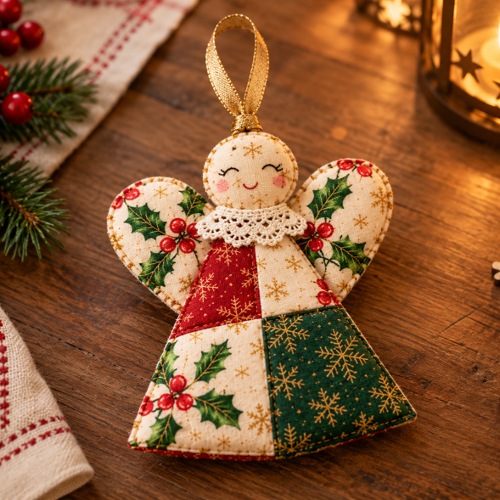
Now you need to fold the ribbon in half and knot the cut ends. Glue the knot near the centre of the heart so the loop extends above the ornament.
You may also glue lace onto the back of the angel’s neck as a collar. Attach the body to the heart-shaped wings using fabric glue or hot glue, secure with clips and let the glue dry completely!
Bonus: Make a Raw-Edge Quilted Angel
Here’s a bonus method for you — enjoy!
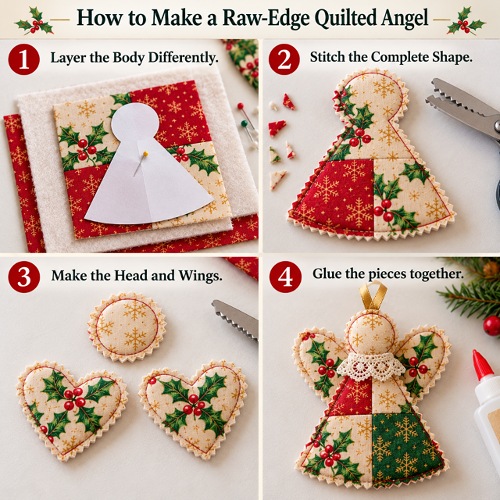
1. Layer the Body Differently.
In this method, you need to place the backing fabric pretty side down, add the batting, then position the four-patch with its pretty side facing up. Pin the body template in place.
2. Stitch the Complete Shape.
Now, sew around the entire body template without leaving an opening. Remove the template and trim the excess fabric using pinking shears.
3. Make the Head and Wings.
For the head, layer the backing, batting, and top fabric with the pretty side facing up. Stitch all the way around, then trim the edges.
For the wings, either use batting between the fabric layers or follow the lightly stuffed method.
4. Glue the pieces together.
Finally, attach the ribbon hanger to the heart, then glue the body and head into place. The raw-edge version skips the turning process, making it quicker to assemble!
Tips for Sewing Small Quilted Ornaments
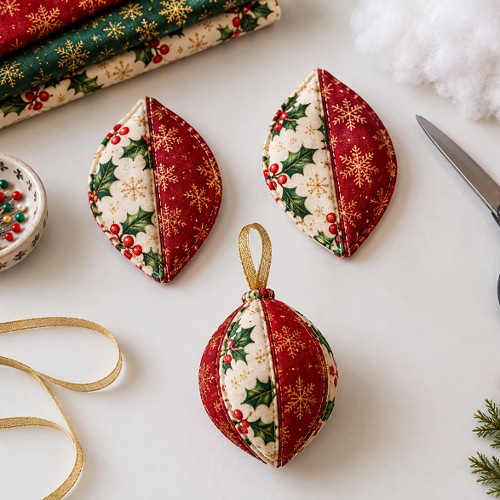
If the centre seams do not line up, then nest the pressed seams before stitching the two halves of the four-patch together.
Since small shapes are difficult to turn, use a blunt-ended tool and work slowly around curves. If your fabric gets caught in the seam, pin or clip the layers together and check the alignment before sewing.
Besides, for bulky-looking curves, trim excess fabric and carefully clip curved areas without cutting the stitches. For bulky-looking head attachment, increase the stitch length to around 3.0 when sewing through the thicker joined layers.
If the wings look flat, add a small amount of stuffing or use batting between the fabric layers.
Common Mistakes to Avoid
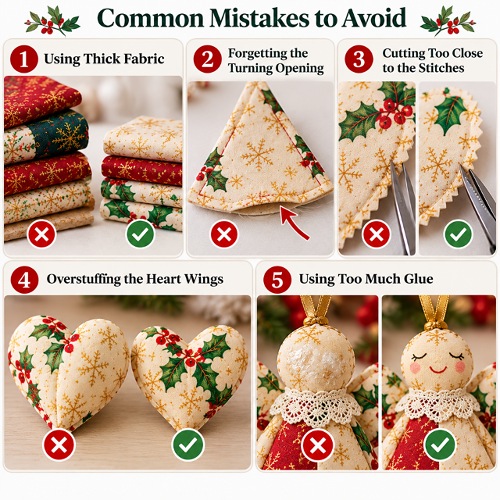
Always use lightweight quilting cotton to make the angel pieces easier to sew, trim, and turn without adding too much bulk. And for a neat finish, leave a small opening in the body, head, and heart-shaped wings so you can turn each piece right side out.
During the trimming process of excess fabric, take extra care around the curves and pointed edges to avoid snipping the stitches.
When it comes to stuffing the heart-shaped wings, a little Poly-Fil goes a long way. Too much can make them look bulky and uneven, so add small amounts until they hold their shape.
Finally, use fabric glue sparingly when attaching the head, body, and ribbon hanger. A few small dabs should do the trick without leaving visible glue marks or making the fabric stiff.
Christmas this year will feel extra special with a handmade quilted angel ornament! How about trying this no-sew fabric star pattern as your next DIY project?