
Learn how to make two adorable cat quilt block patterns with these easy patchwork sewing tutorials. Don’t let those fabric scraps go to waste!
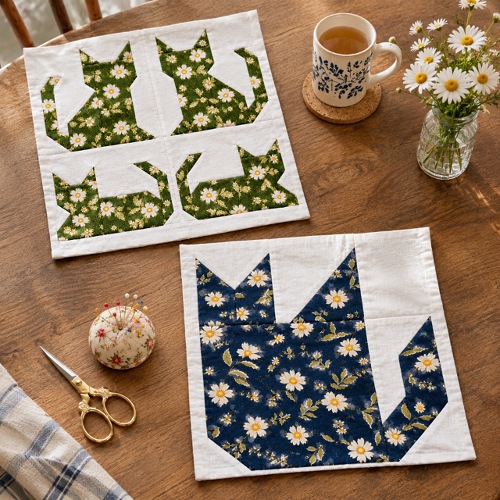
If you love cats and quilting, these adorable cat quilt block patterns are a fun sewing project to try. Make two different patchwork cat designs using simple fabric pieces, basic stitching, and clever diagonal seams. You can create a quilt, cushion cover, wall hanging, or handmade gift!
Materials and Supplies
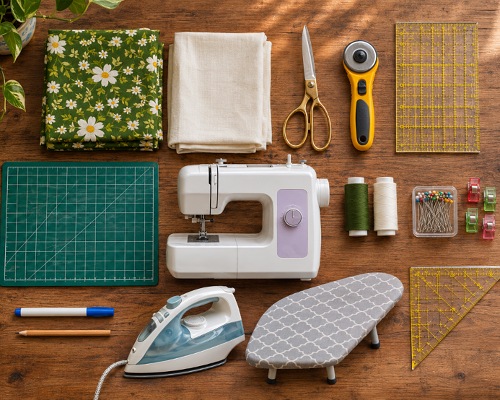
- Printed cotton fabric in your favourite colours and patterns
- White or cream cotton fabric for contrast
- Fabric scissors or rotary cutter
- Quilting ruler
- Cutting mat
- Sewing machine
- Matching sewing thread
- Sewing pins or clips
- Fabric marker or pencil
- Iron and ironing board
- Quilting ruler or set square for accurate cutting
Fabric Measurements for Two Patterns
Design 1: Single Sitting Cat Quilt Block
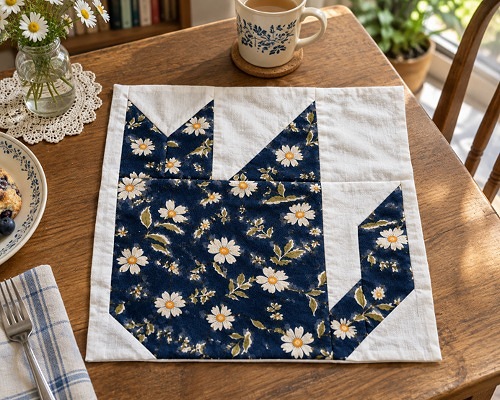
Fabric Pieces to cut
- Pattern fabric – 1 piece: 5 × 10 inches, 1 piece: 3 × 5 inches, 2 squares: 2.25 × 2.25 inches, 2 squares: 2.5 × 2.5 inches.
- White fabric – 1 square: 5 × 5 inches, 1 rectangle: 5 × 2 inches, 1 square: 2.5 × 2.5 inches.
Design 2: Four-Cat Quilt Block Pattern
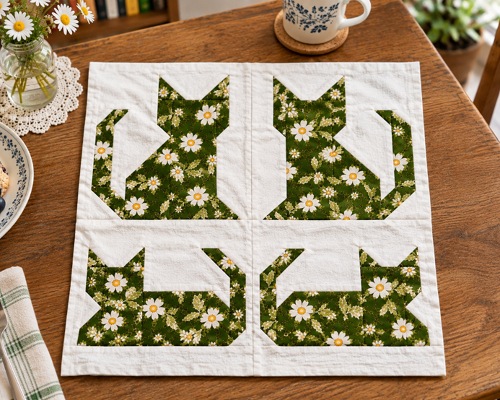
The second design combines two sitting cats and two lying cats. The following measurements are for the individual cat sections.
Fabric Pieces to cut
- Pattern fabric for sitting cat – 1 piece: 2.5 × 4.5 inches, 1 piece: 6.5 × 4.5 inches, 1 piece: 6.5 × 3.25 inches
- White fabric for sitting cat – 1 piece: 6.5 × 3.25 inches, 1 piece: 1.75 × 4 inches
- Pattern fabric for lying cat – 1 piece: 2.5 × 4.5 inches, 1 piece: 4.5 × 5 inches, 1 piece: 5 × 7 inches
- White fabric for lying cat – 1 piece: 5.5 × 7 inches, 1 piece: 3.5 × 4.5 inches, 1 square: 2.5 × 2.5 inches
- Both cat designs – 2 squares: 2 × 2 inches for ears
Before you move on to the steps, take a look at this easy tutorial on how to appliqué using sewing machines!
Steps for Sitting Cat Quilt Block Pattern
Step 1: Prepare the Fabric Pieces
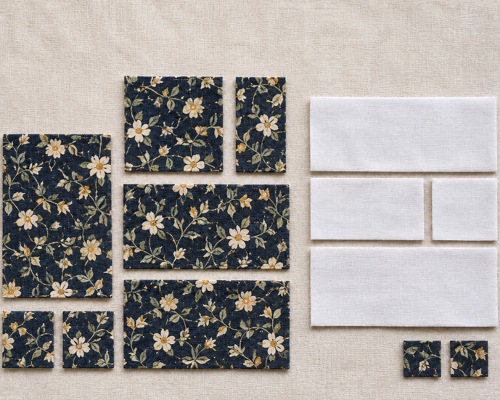
Cut the printed and white fabric pieces according to the first design’s measurements.
The printed fabric will form the cat’s body, while the white fabric creates the background and helps define the cat’s silhouette!
Step 2: Create the Cat’s Body
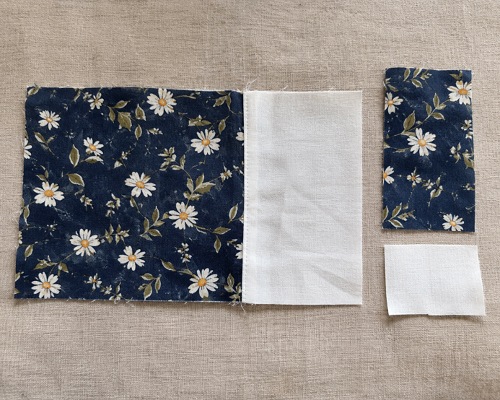
Take the 5 × 10-inch printed rectangle and the small 2.5 × 2.5-inch white square.
Place the white square at one corner of the printed rectangle, right sides together. Draw a diagonal line across the square to mark the stitching direction.
Sew along the diagonal line, trim the excess fabric while leaving a small seam allowance, and press the white triangle open. This creates the angled shape that forms part of the cat’s body!
Step 3: Make the Cat’s Ears for Quilt Block patterns
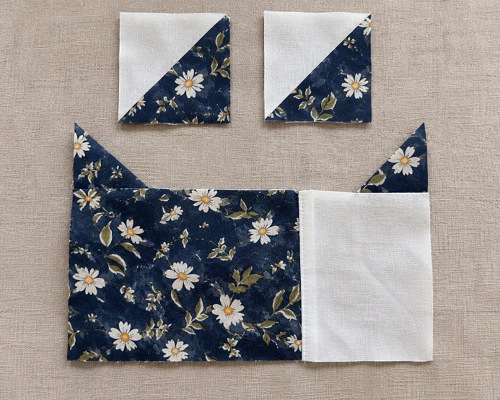
Take the two 2.25 × 2.25-inch printed squares and the 5 × 2-inch white rectangle.
Position the printed squares at the top corners of the white rectangle, with their right sides facing together. Make sure the larger portions of the printed squares are positioned towards the outer edges so the ears point outwards.
Draw diagonal stitching lines, sew each square, trim the excess fabric, and press open.
You should now have two pointed cat ears against a white background!
Step 4: Assemble the Cat’s Head
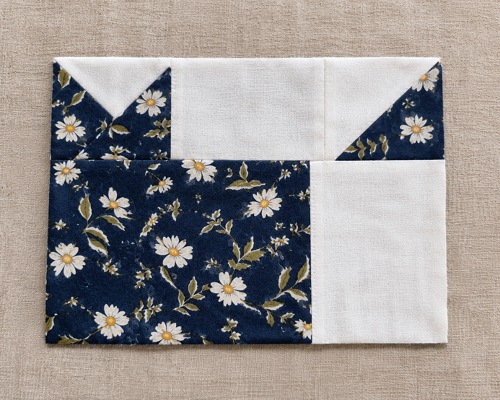
Join the completed ear section to the remaining printed head and body pieces, aligning the edges carefully. Sew the pieces together using a consistent seam allowance and press the seams flat.
Step 5: Complete the Sitting Cat Quilt Block
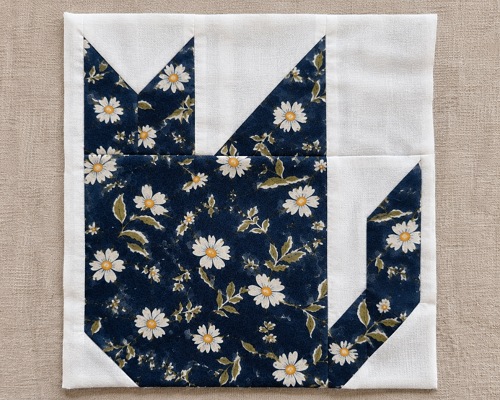
Join the remaining white background square and printed body section to complete the cat’s silhouette. Press the entire block and trim any uneven edges to form a neat rectangular quilt block.
Your first sitting cat is ready! To make the cat face the opposite direction, simply mirror the fabric arrangement.
Steps for Four-Cat Quilt Block
Step 1: Make the Sitting Cat Ears
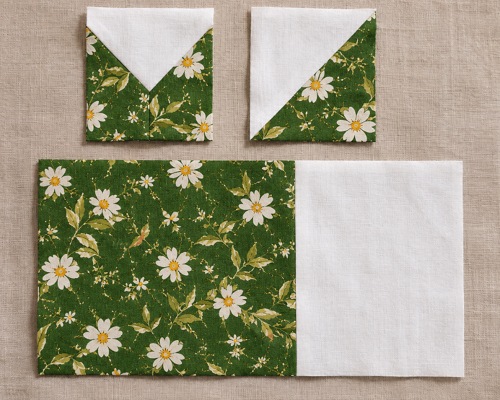
Cut two 2 × 2-inch printed fabric squares and the white rectangle measuring 1.75 × 4 inches.
Place the printed squares at the upper corners of the white rectangle, right sides together. Draw diagonal stitching lines, sew, trim the excess fabric, and press open.
This creates the pointed ears for the sitting cat.
Step 2: Assemble the Sitting Cat’s Body
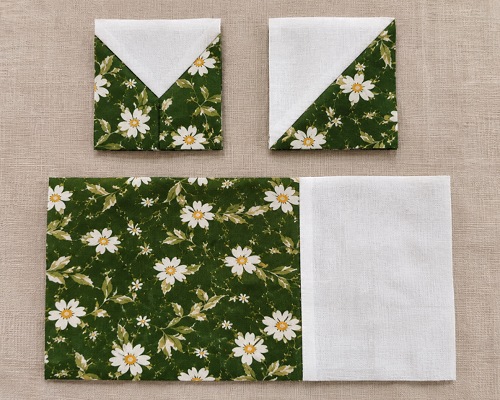
Join the white and printed rectangles to create the cat’s head and lower body sections.
For the lower section, position the white background fabric and printed fabric together, then sew along the diagonal to create the angled silhouette.
Trim the excess fabric and press the seams open. Join the head and body sections to complete the sitting cat. Make a second sitting cat by reversing the fabric arrangement so it faces the opposite direction.
Step 3: Make the Lying Cat’s Ears and Head
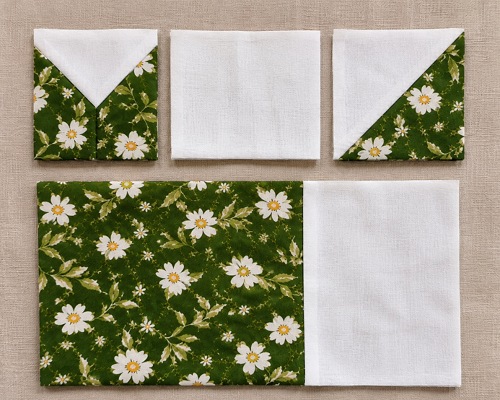
For the lying cat, prepare the two 2 × 2-inch printed squares and the white fabric rectangle.
Use the same diagonal-sewing technique from the sitting cat to create the ears. Keep a little more white fabric visible above the ears to achieve the desired head shape.
Next, join the printed 2.5 × 4.5-inch rectangle to the head section to complete the cat’s head.
Step 4: Assemble the Lying Cat’s Body for Quilt Block Pattern
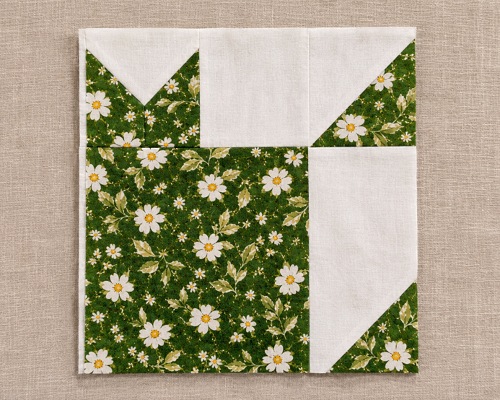
Take the larger printed and white fabric pieces prepared for the lying cat.
Use the small 2.5 × 2.5-inch white square and the 5 × 7-inch printed piece to make the angled lower body section. Follow the same diagonal-seam technique used for the first cat.
Join the remaining printed and white sections to form the cat’s body. Attach the head section to the body, making sure the edges are aligned. Press the completed block and trim any uneven edges.
Create a second lying cat by reversing the fabric placement.
Step 5: Join all Four Cats Together
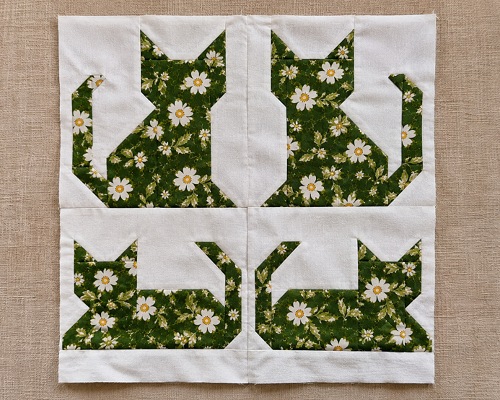
Once you have two sitting cats and two lying cats, arrange them into a four-cat composition. Position the cats so that they face in opposite directions and the overall arrangement looks balanced.
Sew the individual cat blocks together, matching the seams and edges carefully. Press the completed quilt block flat.
Your adorable four-cat patchwork quilt block is ready!
Helpful Tips and Tricks
Always choose contrasting fabrics; use printed fabric for the cats and a lighter background to make their silhouettes stand out! Also, mark diagonal stitching lines as you draw the sewing line; this helps keep the small triangular sections accurate.
Don’t forget to press seams after every step. It helps the individual pieces lie flat and makes joining them easier. Keep your seam allowance consistent to help all the fabric sections fit together properly.
Finally, mirror the designs carefully; reverse the placement of the fabric pieces to form cats facing opposite directions.
Don’t you want to share this tutorial for a cat parent right away? Go ahead and try these fabric hanging baskets as your next DIY project!